 Vanda Engine
In this tutorial, I show you how to animate objects in 3ds Max using path constraints, bake keys, and export the animation to COLLADA format with OpenCOLLADA.
Setting the animation time
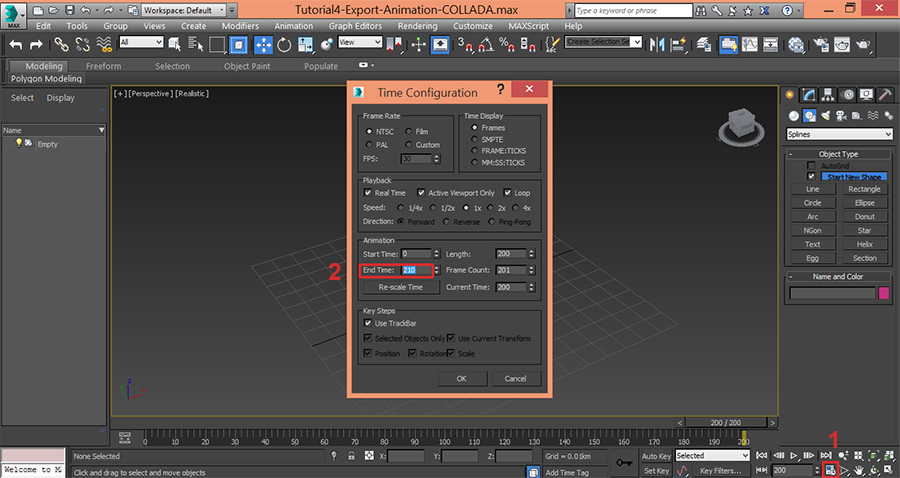
Run 3ds Max. I like to assign 200 keyframes for our animation. Hit the Time Configuration button and in End Time tab, enter 200.
Creating the path
Hit alt+w on the Top view window to maximize it. Switch to the Splines panel and click the Ellipse button. Click and drag on the viewport to create a smooth ellipse.

Now I’m going to animate a spaceship with this ellipse. I import the spaceship model, but you can use your preferred 3D model.
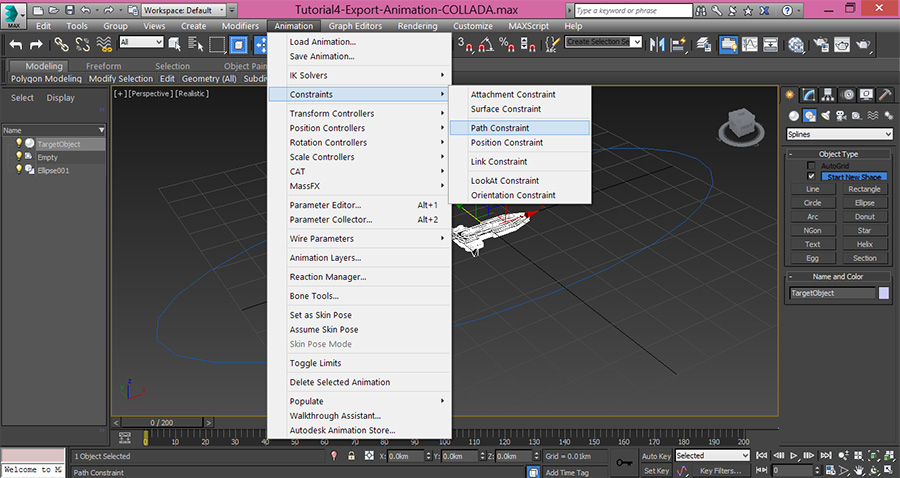
Now select your desired 3D mesh and from the main menu, go to Animation | Constraints | Path Constraint.
Now a dotted line links the spaceship and the mouse cursor, which means spaceship is requesting a path to follow. Click the ellipse path to complete the assignment of the path constraint. Once you pick the path, the spaceship jumps to the start point of the path.
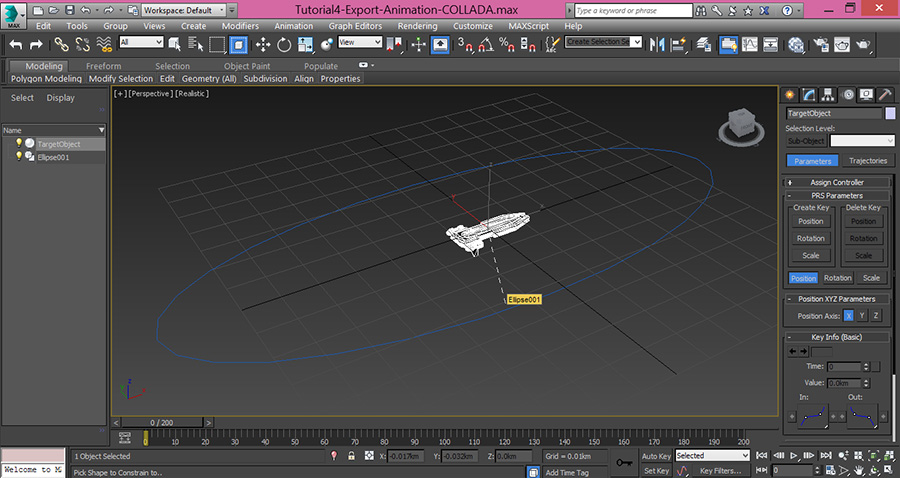
Spaceship is requesting a path to follow

Our Spaceship assigned to the path
Now as you drag the Time Slider, the spaceship moves along the path. However, its rotation is not controlled by the ellipse.
Following the Path
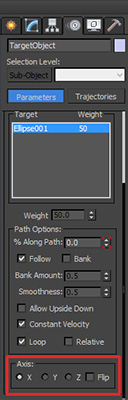
Make sure that spaceship is selected, then switch to the Motion panel, click the Parameters tab, roll out Path Parameters, make sure that Ellipse path is selected in Target section, and check Follow checkbox.
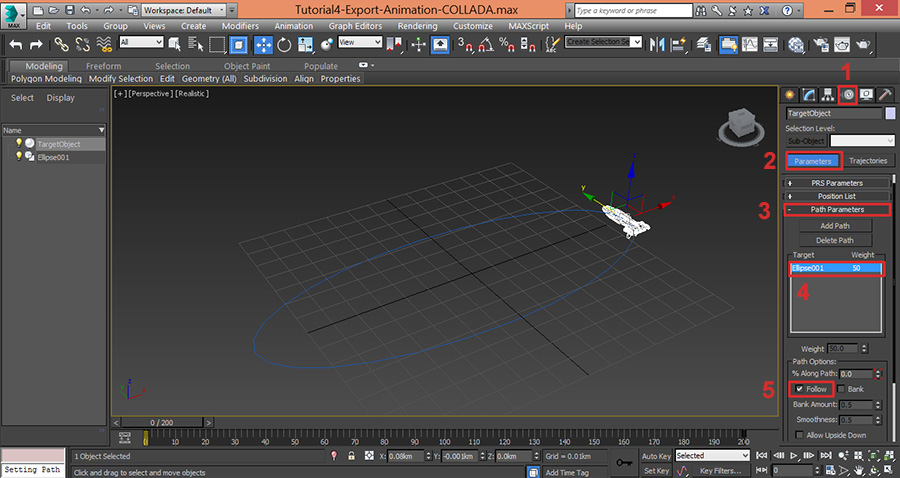
Drag the Time Slider to test the animation. If your model follows the path in wrong direction, change the axis is Axis section.
If you export the spaceship to COLLADA format and test the animation in Vanda Engine, you’ll notice that the spaceship direction does not change over time. Now we fix this problem.
Spaceship direction does not change over time
Baking Keys in 3ds Max
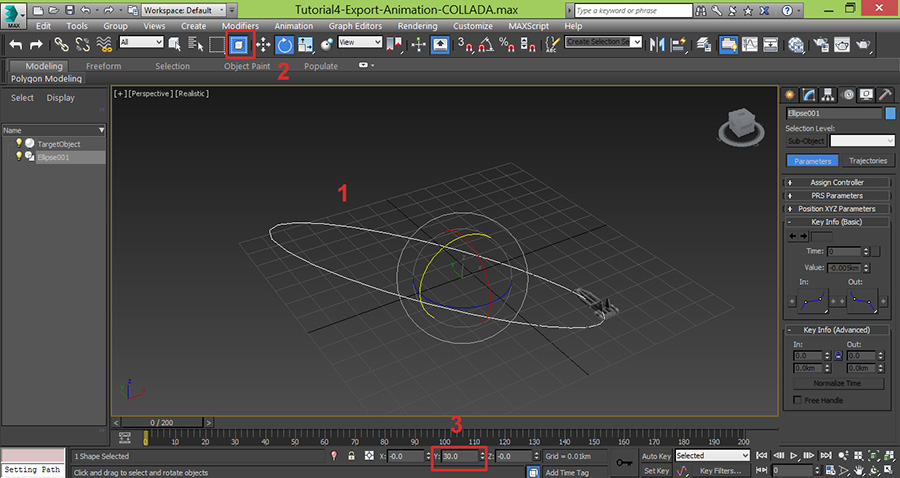
Before baking keys, I’m going to modify the path. Select the Ellipse path, Click Select and Rotate, and in Y field, type 30.
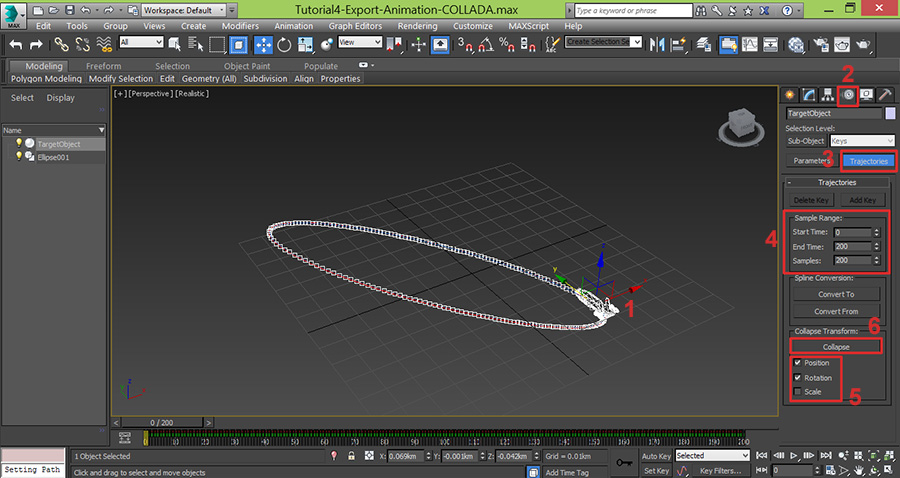
To bake the keys, make sure that your spaceship model is selected, then go to the motion panel, select Trajectories, roll out Trajectories and set the values of Sample Range. Sample range is your timeline or animation length:
- Start Time: 0. It’s the beginning of your animation.
- End Time: 200. It’s the end of your animation
- Samples: 200. This value specifies how many keys will be set. We want to have all frames keyed.
Collapse Transform specifies what do you want keyed? Position, Rotation, or Scale. I have only changed position and rotation of spaceship with Ellipse path, so I check Position and Rotation. Now click Collapse button to bake the animation keys.
Creating Camera
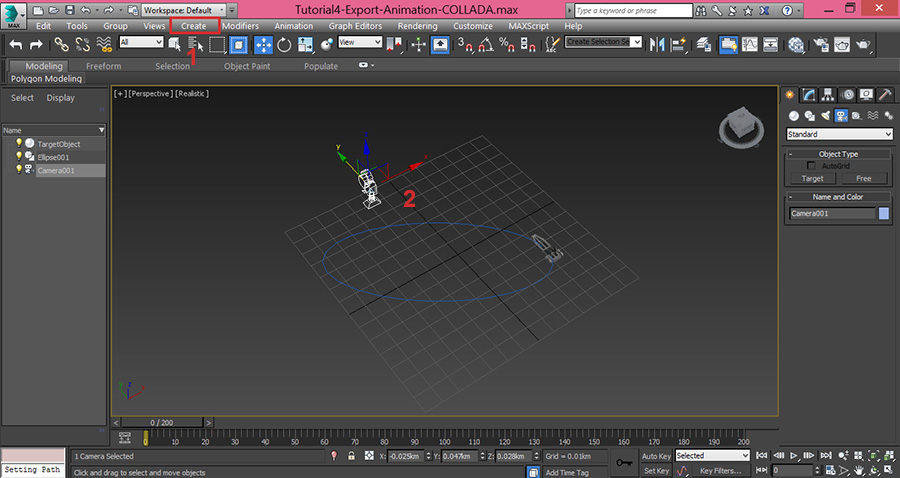
From the main menu, select Create | Camera | Free Camera. Now click left mouse button on Perspective viewport to create one free camera.
Looking at Spaceship
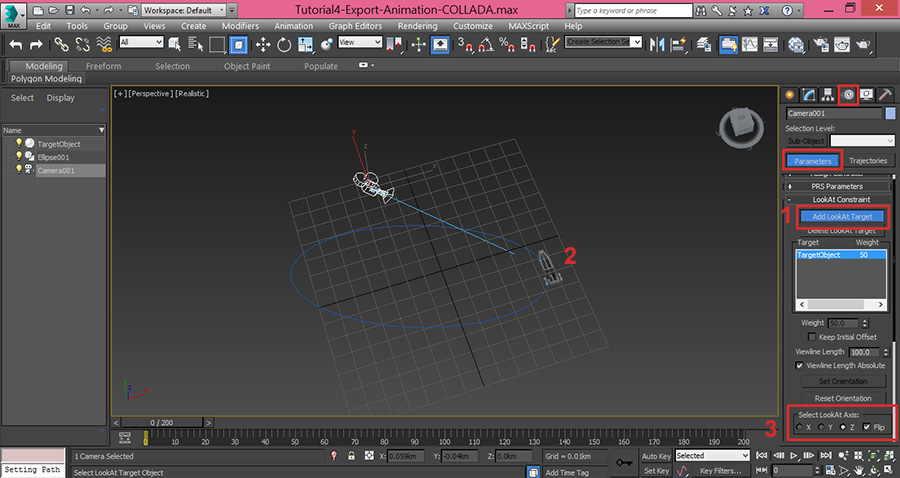
Make sure that camera is selected, then switch over to the Motion tab, make sure that Parameters button is selected, roll-out the Assign Controller menu and select Rotation: Euler XY. Click the Assign Controller button, select the Look At Constraint option from the pop-up window and click OK.

With camera still selected, roll in Assign Controller, roll out Look At Constraint, hit Add Look At Target, and select spaceship on perspective viewport. If camera points to the wrong direction, use Select Look At Axis to change the camera axis.
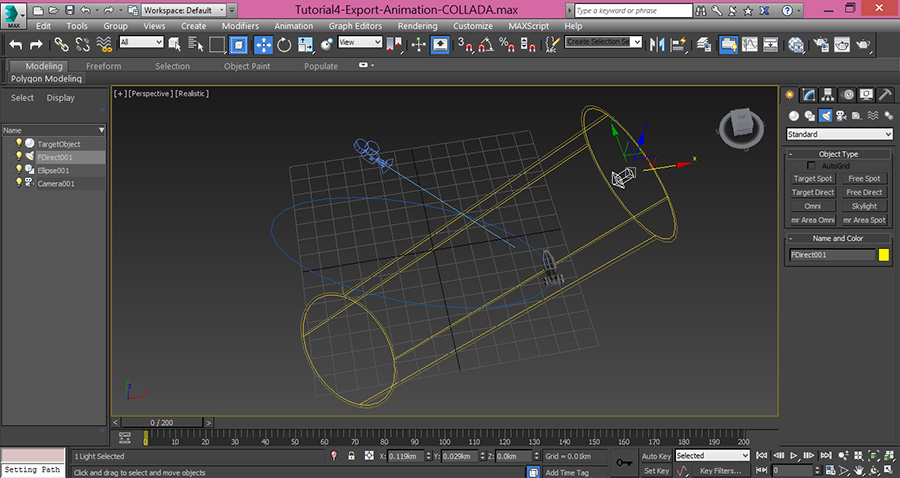
Adding a directional light
From the main menu of 3ds Max, go to Create | Light | Standard Lights | Directional. Then left click on perspective viewport to create a directional light. You can use Rotation/Translation tools to change the position and direction of light.
Exporting to COLLADA format with OpenCOLLADA
We use OpenCOLLADA to export the scene to COLLADA format. For more information about OpenCOLLADA, please visit this tutorial.
Go to File | Export | Export. In Save As Type, choose OpenCOLLADA, give your file a name and hit Save button. This will open the OpenCOLLADA export dialog. Make sure to set the following parameters:
- Bake Matrices: Unchecked
- Normals: Checked
- Enable Export: Checked
- Sample Animation: Checked
- Start: 0
- End: 200
Hit OK button to export the scene.

Importing into Vanda Engine
Run Vanda Engine. Make sure that you are in Prefab mode (Mode | Prefab). Morever, add “_LOD1” post-fix at the end of your dae file name (For example spaceship_LOD1.dae). From the main menu of Vanda Engine, choose File | Import | External Scenes…. Locate the DAE file and click Open. Vanda Engine should report that new external scene imported successfully.
You will be able to see the animation of spaceship model. However, COLLADA cameras are not active by default. You should use Tools | Select Camera… menu to activate your desired camera.
Do it now and in new dialog box that appears, choose the name of your imported camera and hit OK.
(c) copyright Zehne Ziba Co., Ltd. For more information, please refer to copyright notice.