 Vanda Engine
In this tutorial, we assign Collider Body and Rigid Body Simulation Tags to our box and sphere objects, setup the gravity factors, bake the animation, and export the scene to COLLADA 1.4 format.
Setting Up The Scale Metrics
First of all, we need to setup the scale metrics. We have already discussed about this topic in previous tutorial (please refer to A Quick Note About Scaling). Run Cinema 4D, make sure that Attributes tab is selected, and set the scale metrics to Meter.
Creating The Cube
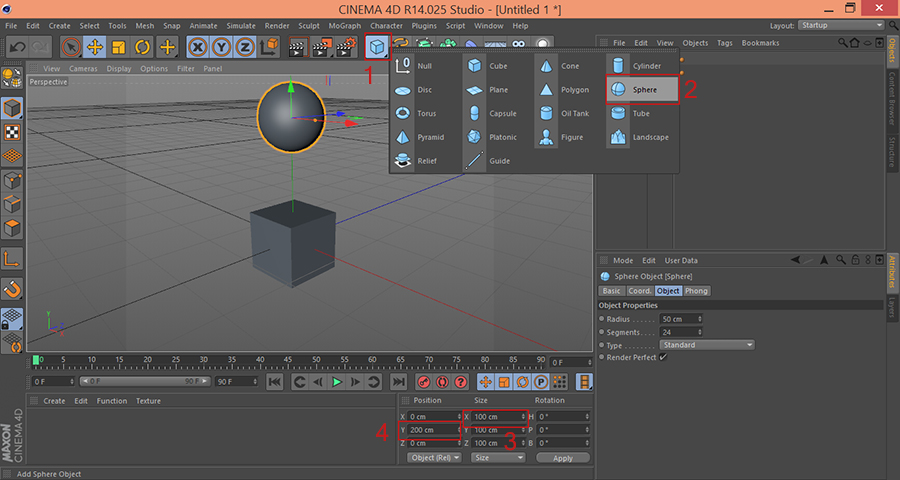
Hit Cube button to create an standard cube. Now we’re going to scale the cube to make sure that its dimensions is identical to a (1,1,1) cube in Vanda Engine (and most game engines). Make sure that cube object is selected, and enter 100 cm in Size X field. Press Enter to confirm your changes. This will scale down your cube object. You must zoom in your view with mouse wheel to be able to see the cube object.

Creating The Sphere
Click and hold the cube button again, hover over the sphere button, and release the mouse button to create a new Sphere object. Again, type 100 cm value in Size X field and press enter to scale down the sphere. Finally, move the sphere directly 200 cm units in a positive Y direction (up) which is equal to 2 units in Vanda Engine.
Scaling The Cube
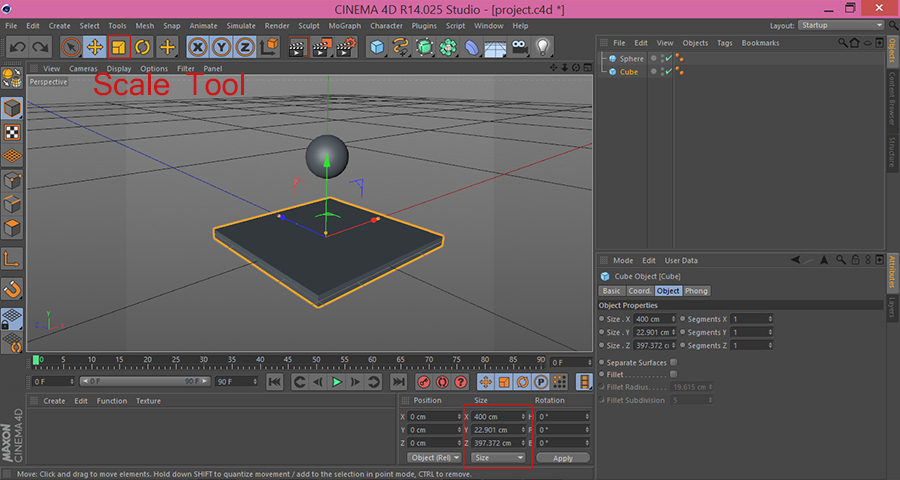
As we’re going to assign a Rigid Body tag to our sphere object, we should make sure that our cube model doesn’t let the sphere to fall down forever. In order to achieve this, we’ll stretch the cube in X and Z axes and assign a Collider Body Simulation Tag to our floor. Select the Cube object, choose Move tool, and grab the X (red) handle to scale up the cube in X direction. Use the same method to scale up the cube in Z direction. Finally, grab the Y handle to scale down the cube in Y direction. Now it should look like a floor:
Assigning Simulation Tags
Adding a Rigid Body tag to an object will put its motion under the control of C4D’s physics engine. Once applied to our sphere object, it will fall due to gravity. Our sphere will keep falling to infinity unless there’s a surface for it to fall into. In order for our sphere object to react to and interact with floor object, we must apply a Collider Body tag to our floor. A Collider Body is an object that has a collider, but its position doesn’t change over time.
Make sure that Sphere object is selected. From the Tags menu, point to Simulation Tags | Rigid Body. This will assign a Rigid Body tag to our sphere object.
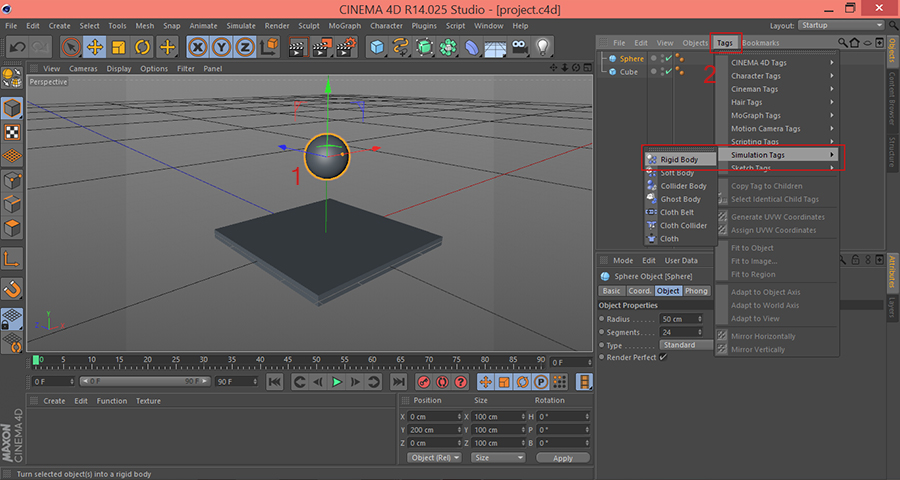
Similarly, select the floor object and point to Tags | Simulation Tags | Collider Body to assign a collider to the floor.
Changing The Gravity
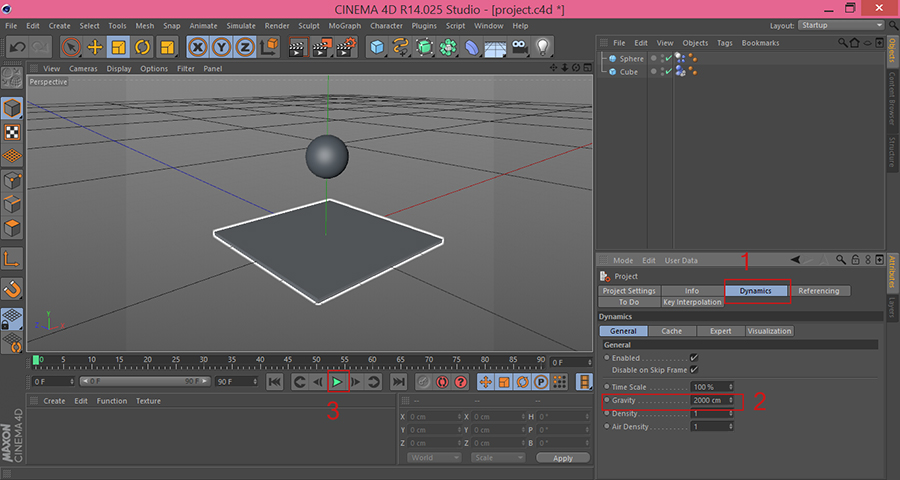
Press the Play Forward button to test the animation. As you see, the sphere falls very fast and falls down after bouncing on floor surface. To solve this problem, hit Ctrl + D to bring up the project settings, press Dynamics tab, and type 2000 cm in Gravity field. Press Play Forward button again to test your animation.
Baking The Animation
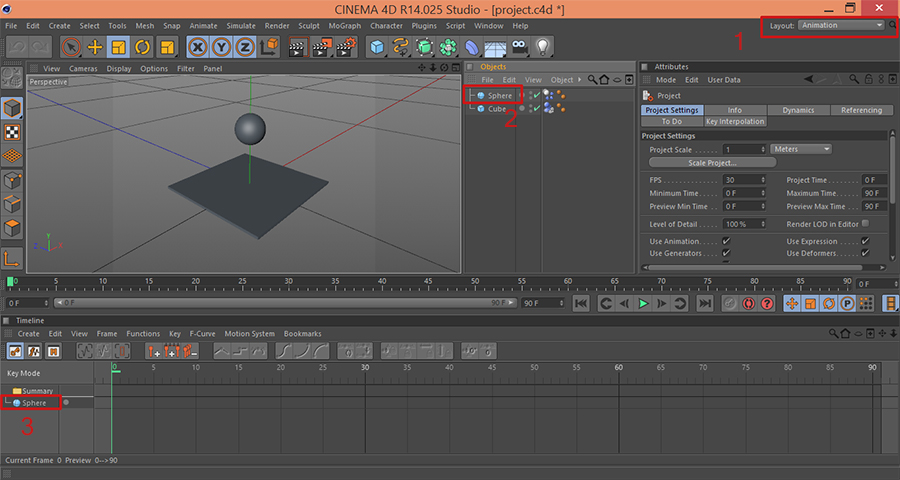
In order to export the animations to COLLADA format, you must bake the animations. From the Layout drop down, choose Animation layout. Now drag and drop sphere object from Object panel to Timeline panel.
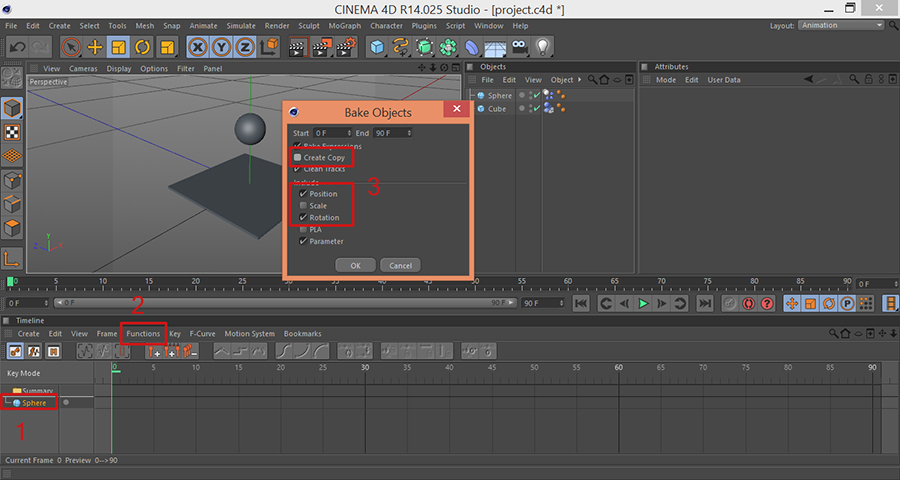
Make sure that your sphere object in Timeline panel is selected (it becomes yellow), the point to Functions | Bake Objects… menu to bring up the Bake Objects dialog. We want to apply Bake Animation to our original sphere (not its copy), so uncheck Create Copy. Our animation only changes position and rotation values of sphere object, so make sure to include Position and Rotation parameters. Press OK button to bake the animation.
Exporting To COLLADA
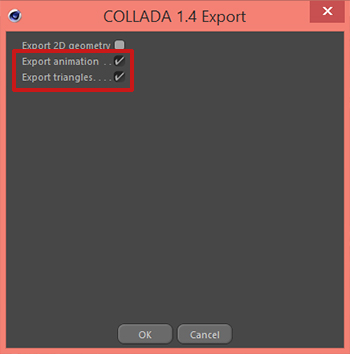
Now that we have baked our animation, it’s time to export our scene to dae file. Vanda Engine (and most game engines) are compatible with COLLADA 1.4. From the main menu of Cinema 4D, go to File | Export… | COLLADA 1.4 (*.dae). Choose your desired location, give your file a name, and press Save button. This will open up the COLLADA 1.4 export dialog which lets your change a few options for exporting to COLLADA 1.4. Make sure that Export Animation and Export Triangles are selected, and press OK button to export your scene to dae file.
Watch the animation imported into Vanda Engine in COLLADA 1.4 Format
(c) copyright Zehne Ziba Co., Ltd. For more information, please refer to copyright notice.