 Vanda Engine
Curves are useful for creating smooth paths for objects to follow. In this case we’re referring to Bezier Curves or NURBS Curves. Curves can also refer to F-Curves which can be seen in the Blender’s Graph Editor.
Before we start we’ll need an object to animate. I’ll be using a spaceship in this example, but this technique can be applied to a variety of objects.
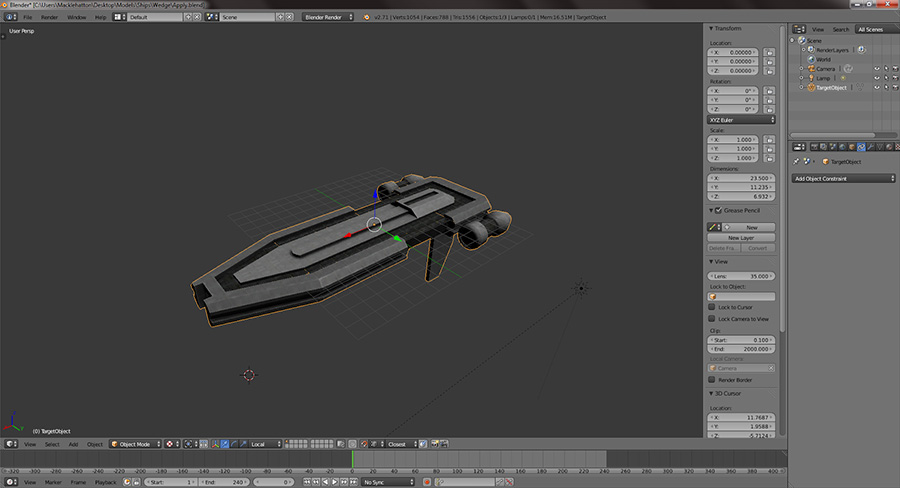
Our object to animate
Using Curves
First we’ll add a curve, you can use any type of curve but for this tutorial we’ll use a Path, which is a type of NURBS Curve. Hit Shift-S and select Cursor to Center. Hit Shift-A, hover over Curve, and select Path. We’ll use this to create the path we want our object to follow.

Adding the path
Your Path may be covered by your object and you’ll want to move it into view using the Transform Manipulator. Hit Tab to enter edit mode. The points on the Path can be selected and moved using the transform manipulator, or moved freely by hitting the G key. I find it easiest to shape the path from above first, then from the side. Hit 7 on the numpad to see your scene from the top.
Manipulating the Path’s control points
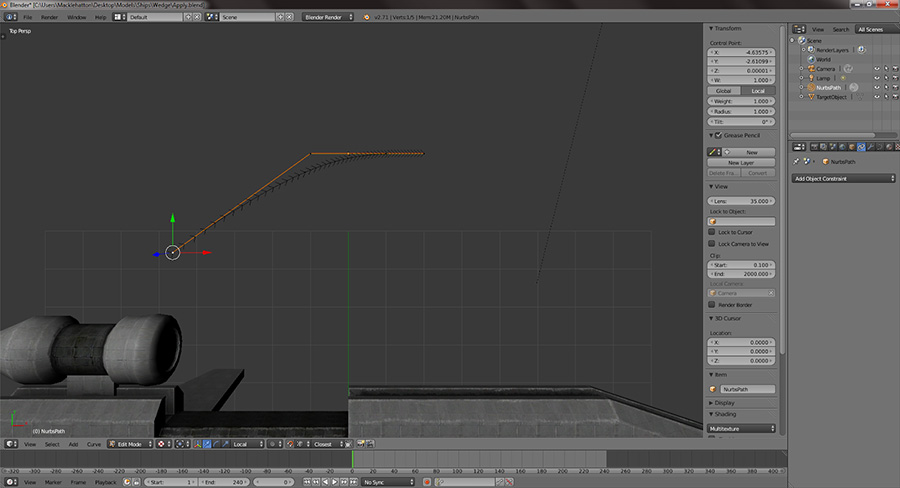
To extrude the Path select an outer point and hit E, drag the new point to the location you want it and click to confirm. Draw the path you’d like your object to follow by extruding it multiple times.

Extruding the path

Drawing the path from above

Add height from the side
If you want your path to be a loop or circle, hit Alt-C to close the loop. After drawing the general shape of your Path you may want to make it larger or smaller to suit the scale of your object. Press A until all the points are highlighted, then hit Shift-S and drag the mouse to scale the Path to the size you’d like, then click to confirm.
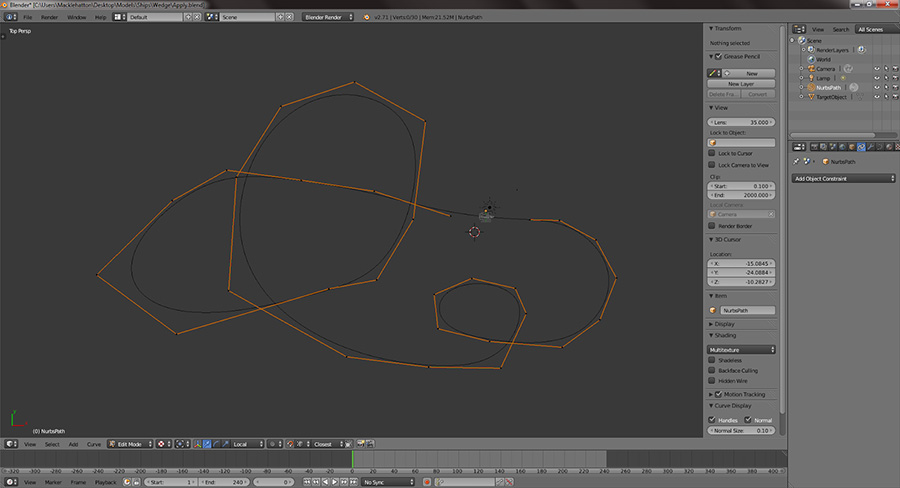
Scaling up the path
Press tab to exit edit mode when you are finished.
The Follow Path Constraint
Now we want to animate the object along the path. Select the object you want to follow the path. Click the Constraints tab in the Properties panel, click Add Object Constraint, and select Follow Path.

Adding the Follow Path Constraint
Click the target field and select the Path we created from the list. It will be the only one if you only created one Path, and it will be called NurbsPath.
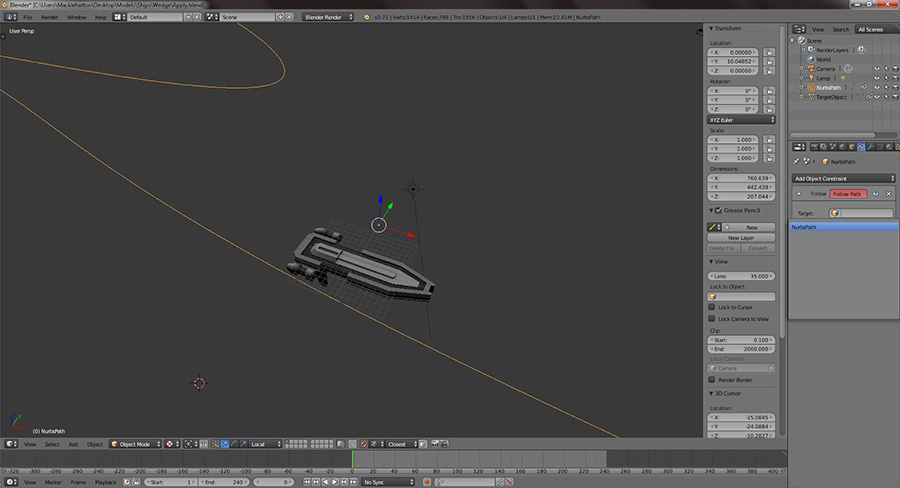
Setting the Target to be the Path
The object should move to a point along the Path. If it isn’t on the path, set its XY and Z location values to zero. Changing its Location values to numbers other than zero acts as an offset from the Path. For instance, to have your object move above the Path you would increase the Z value.
The Follow Path constraint has a number of settings. To make the object face forward as it moves along the path we’ll check the box marked Follow Curve. Below where it says Forward select the axis that will point your object forward.
In this example it’s the X axis. You can also enter a number into the Offset field to change where your object starts along the Path.
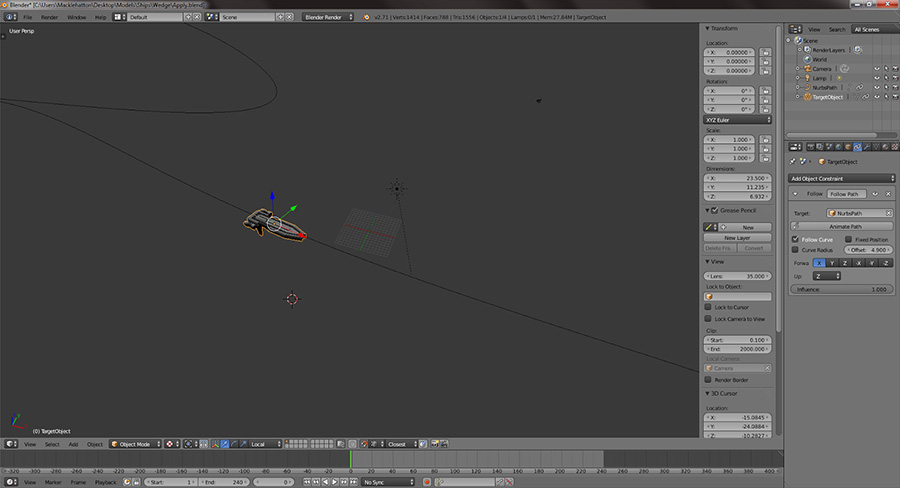
Follow Path settings
Click the Animate Path button on the constraint. Now when you click the Play button on the timeline your object should move around along the Path. You’ll probably notice it’s moving too slow or too fast.
Select the Path again and click the Object Data tab on the right. Under where it says Path Animation you’ll see a box marked Frames. To make your object move more slowly increase this number and decrease it to make it move faster.
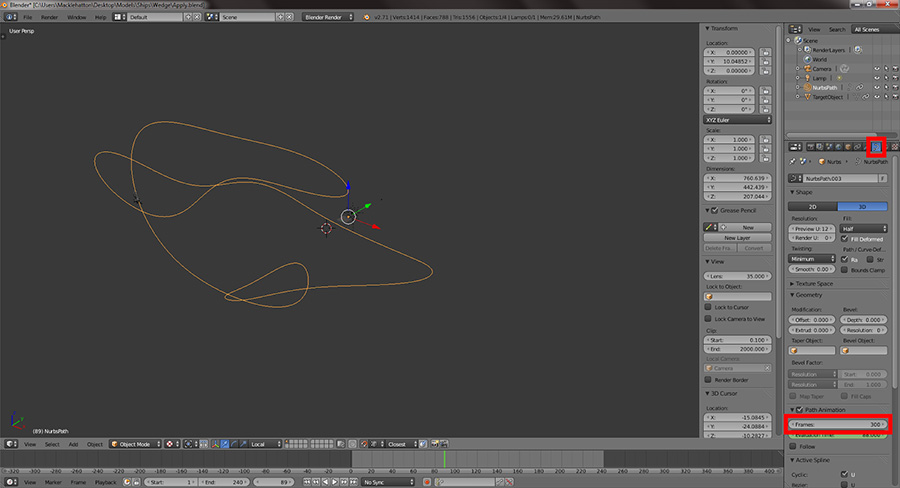
Changing the number of frames the animation takes to complete
Once you’ve found a good speed you’ll want to make the animations length match the number of frames you entered into the Frames box. This will make the animation loop seamlessly. To do this drag the Cursor in the Timeline to the position corresponding to the number you entered. Hit E to set this as the endpoint of the animation.
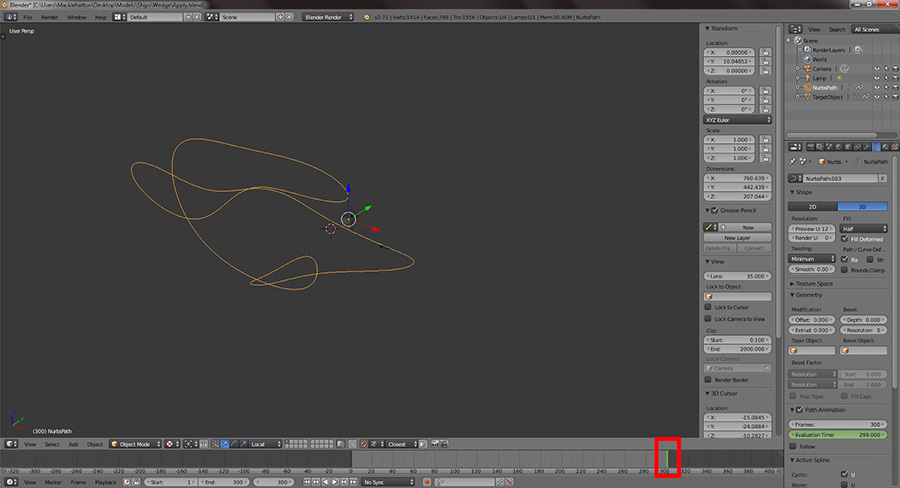
Setting the animation’s end point
Now when you watch the animation all the way through the object should appear to be in the same place at the beginning and end of the animation.
Rolling The Object
To make the spaceship in this example look more like it’s flying we’ll want to make it roll or bank with each turn. In the timeline, move the cursor to a position you’d like to the object to roll. Rotate the object on its local X axis by hitting R, then X, then X again and use the mouse to set the rotation. When you’re done rotating click to confirm. Insert a rotation keyframe by hitting I and selecting Rotation from the list. Drag the cursor to see how the object starts to roll. Blender interpolates into the angle we selected, we only need to create keyframes where we’d like to object to start and stop rolling.
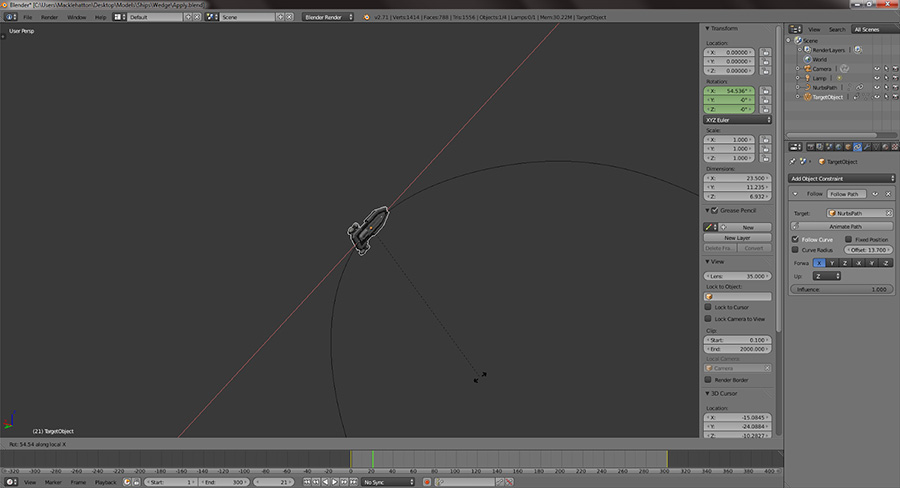
Rolling the ship
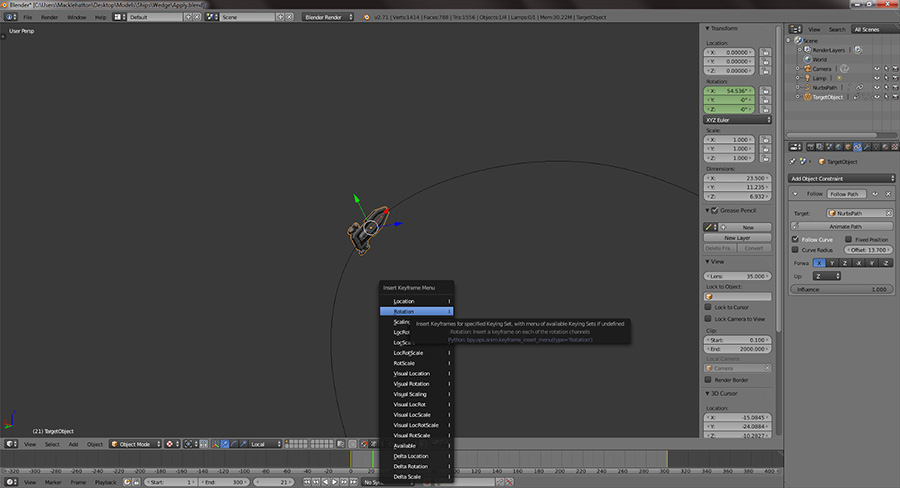
Adding the Rotation Keyframe
To make sure the animation still loops properly make sure your object’s rotation is the same at the beginning and end of the animation. The easiest way to do this is to set the rotation to zero and create a Keyframe at the beginning and end.
Animating The Camera
First we’ll make sure the camera is always looking at the object we’re tracking, this will make positioning the camera easier. Select the camera and then Shift select the target. With the camera and your object selected press Ctrl-T and select Track To Constraint. You must select the camera first and the object second or the constraint will be applied to the object and not the camera.
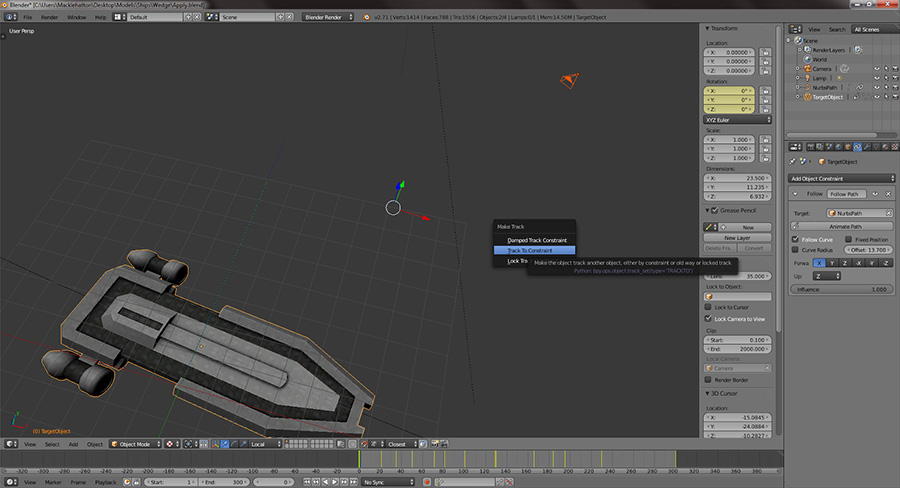
Adding the Track To Constraint
Now that the camera is always looking at the object we can change its position without worrying about its rotation. Let’s add a few locations keyframes. Move the Cursor in the Timeline to the point in the animation you’d like the camera finish moving. Since Blender interpolates movement we’ll first position the camera where we’d like it to end up, and then adjust when it starts moving if needed.
Again, if you want your animation to loop make sure the camera is in the same position in the first and last frame. Position your camera where you’d like it to be at the start and end of the animation. In the Timeline, move the Cursor to the first frame, press I and select Location. Now move the Cursor in the Timeline to the last frame and add another Location keyframe. Now no matter what you keyframes add in between, the animation should loop correctly.

Adding a Location Keyframe
Be sure to watch your animation from the perspective of the camera as you’re creating it. You can toggle camera view by hitting the Numpad 0 key.
Export
There are a couple things we’ll need to do before exporting our scene. Select the object and hit Spacebar and type “Bake Action”. Click Bake Action and click OK on the dialogue that appears. Select the camera and do the same.

Now delete the Path we created before. The object should now animate the way it did before but without the curve.
Select File > Export > Collada (Default) (.dae), navigate to the location you’d like to export the scene and animations to, and select Export COLLADA.
For more information on exporting, see Tutorial 1: Exporting From Blender To COLLADA Format.
Importing Into Vanda Engine
Make sure that you are in Prefab mode (Mode | Prefab). To open the scene in Vanda Engine, select File > Import > External Scene (*.dae) …, find the file you exported before, select it, and select open. Your scene should appear in the 3d window with both the object and the camera moving. To view the scene through the animated camera select Tools > Camera and Rendering…, select the imported camera from the list, and select Activate. You should now see the scene through the animated camera the same way it appears in Blender.
Related Tutorial

Animating An Object In Blender Using Armatures And Exporting To COLLADA Format
In this tutorial we create a simple earthworm model, rig, animate, texture, and export it. This is nearly the entire 3d modelling and animation pipeline. No one step is very complicated, but there are a lot of steps and details to learn about.
The Author

Patrick Manhatton (macklehatton@gmail.com)
Patrick is an independent game designer interested in absolutely every aspect of making games. He does a little of everything involved in game development and a lot of conceptual design and 3d modelling. He is currently studying computer science and psychology and hopes work in research using games.
(c) copyright Zehne Ziba Co., Ltd. For more information, please refer to copyright notice.