 Vanda Engine
In this tutorial, I want to show you how to create a camera follow a B-Spline path. Animating a camera along a spline in Cinema 4D is very straightforward: You create a spline, create a camera, align the camera to spline, and set its initial and end positions to move the camera appropriately. In order to export your animation to COLLADA (dae) format, you must bake the animation in Cinema 4D. Otherwise it won’t be able to export your animation.
Creating The Cubes
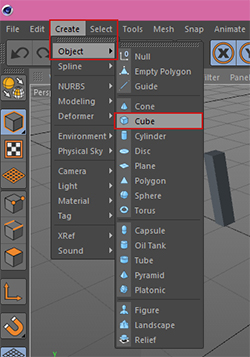
First of all, I create 3 cubes in Cinema 4D. In order to create the cubes, simply point to Create | Object | Cube menu.
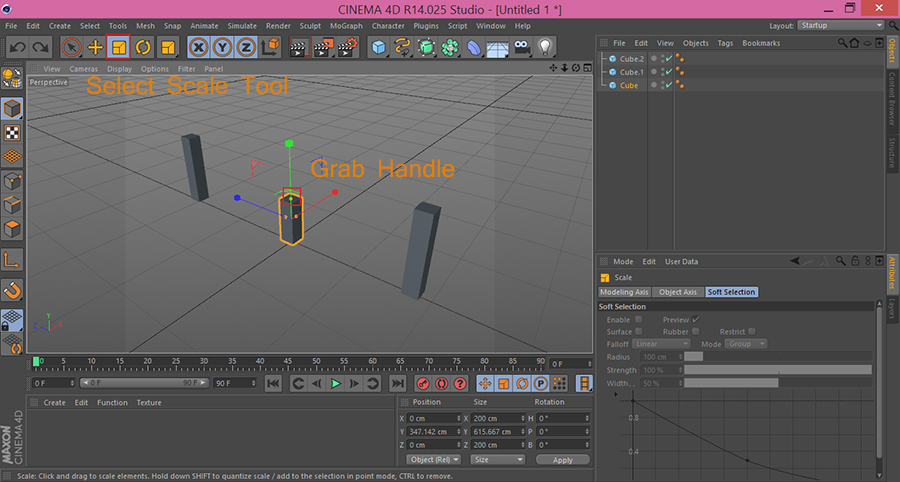
I also want to change the scale of my cubes in Y direction by selecting the Scale tool, grabbing the Y handle and dragging the mouse in Y direction. Now my objects look like this:
Creating The Spline
In this tutorial, I create a B-Spline spline. The reason I decided to choose B-Spline is that I have more control over B-Spline and they are smoother than Freehand Splines.
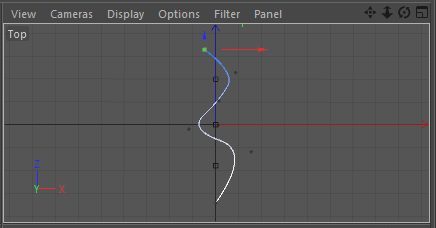
In order to draw an accurate B-Spline spline, I’m gonna activate and zoom in the top view first.
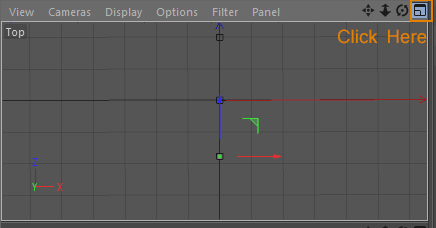
Now it’s time to create our B-Spline. From the main menu of Cinema 4D, go to Create | Spline | B-Spline. In order to start drawing your B-Spline, click somewhere in the viewport to create the first handle of your B-Spline. When we later attach our camera to this spline, the camera is attached to this initial handle. So care should be taken to select a good initial point for your B-Spline.
Click somewhere else to create your second handle. This will draw a line from first handle to second handle.
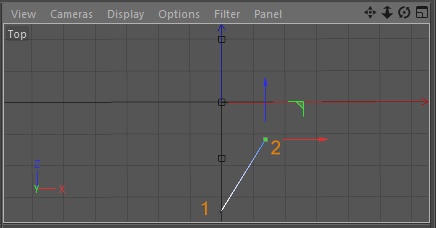
Create another handle and drag the mouse to make a smooth curve. Repeat the same process to build your B-Spline spline.
Now I’m going to move the B-Spline up. Press and hold the Cube button on the left side of Cinema 4D and select the Model Mode. Choose move tool, select your B-Spline, and drag the mouse in positive Y direction to move it up.

Creating And Aligning The Camera
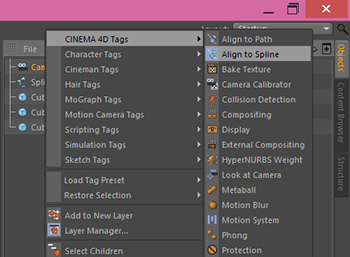
From the main menu of Cinema 4D, go to Create | Camera | Camera. Right click on the camera name and from the menu that appears, choose Cinema 4D Tags | Align To Spline.
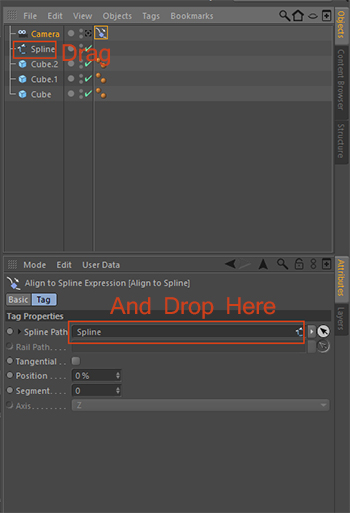
Now drag the spline name and drop it into Spline Path.
Again, right click on camera name and this time, choose Cinema 4D Tags | Align To Path.

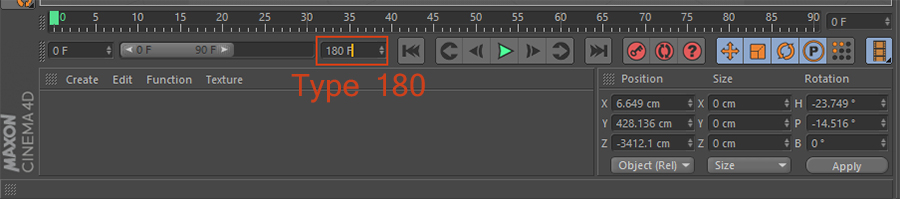
Before I start animating the camera along the spline, lets increase the number of key frames. By default, C4D animation is 90 frames long. Assuming your animation runs at 30 frames per second, 90 frames is equal to 3 seconds of animation. Lets double that value and extend our animation from 3 seconds to 6 seconds.
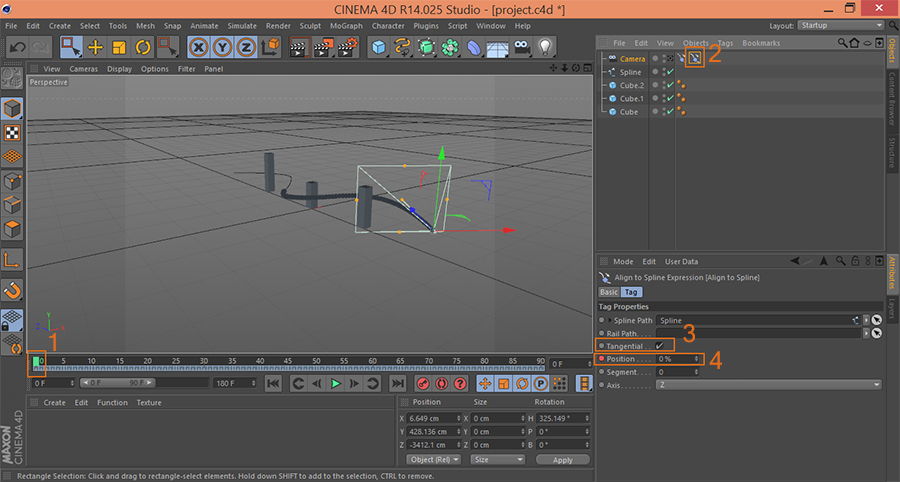
In order to set the first frame of our animation, animation marker is at frame 0, hit Align To Spline Expression button, make sure that Tangential is checked and the value of position is 0%, hold Ctrl button, and click the circle that is located beside Position.
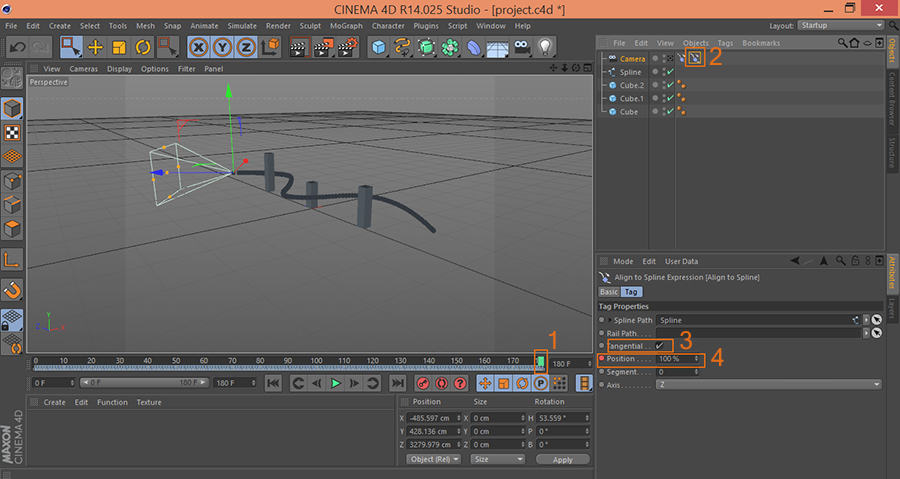
Now move your animation marker to frame 180, make sure that Tangential is check and the value of Position is 100%, hold Ctrl button, and click the small circle beside the Position.
Baking The Animation
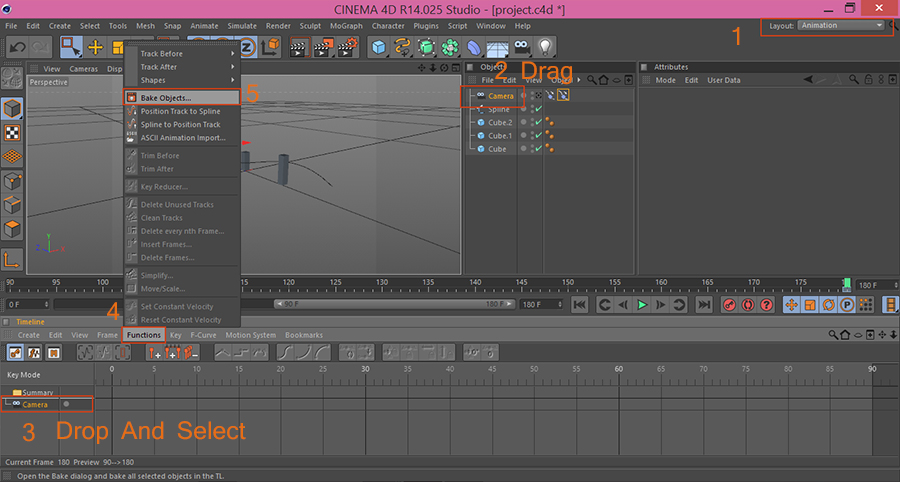
In order to export the animations to COLLADA format properly, you must bake the animations. From the Layout drop down menu, select Animation layout. Now drag and drop camera object from Object panel to Timeline panel.
Select your camera in Timeline panel and from the Functions menu, choose Bake Objects…
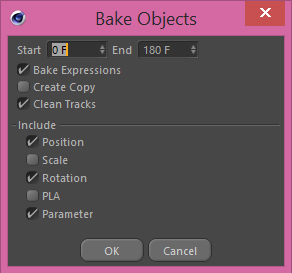
This will bring up the Bake Objects dialog. Make sure that Start frame is 0 and End frame is 180, Position and Rotation are selected, uncheck Create Copy and Scale (because we don’t want to create a copy of camera and we’re not changing the scale of our animated camera) and hit OK button to bake your animation.
Exporting To COLLADA
Now that we have everything set up, we’re ready to export our scene to COLLADA format. Vanda Engine and most game engines and 3D tools are compatible with COLLADA 1.4. From the main menu of Cinema 4D, point to File | Export | COLLADA 1.4 (*.dae). Select a name for your dae file and press Save button. In new dialog that appears, check Export Animation as well as Export Triangles and hit OK button to export your scene to dae format.
(c) copyright Zehne Ziba Co., Ltd. For more information, please refer to copyright notice.