 Vanda Engine
In this tutorial, you will learn how to make a water, with realistic reflections and ripples.
Creating The Sky
The surface of the water reflects the color of the sky. By default, the scene color is black. So our waters would appear black.
Run Vanda Engine and make sure that you are in VScene mode (Mode | VScene). From the main menu of Vanda Engine, choose Create | Sky Dome… This will bring the Sky Properties dialog which lets you set the sky properties and create the sky dome. For more information about sky dome in Vanda Engine, please refer to this reference.
For this tutorial, I’m going to create a very big sky dome. Make sure to set the following values and hit OK button to create the sky dome:
- X, Y and Z: 0
- Radius: 700
- Dampening: 0.9
- Sides: 20
- Slices: 20

Creating The Ocean
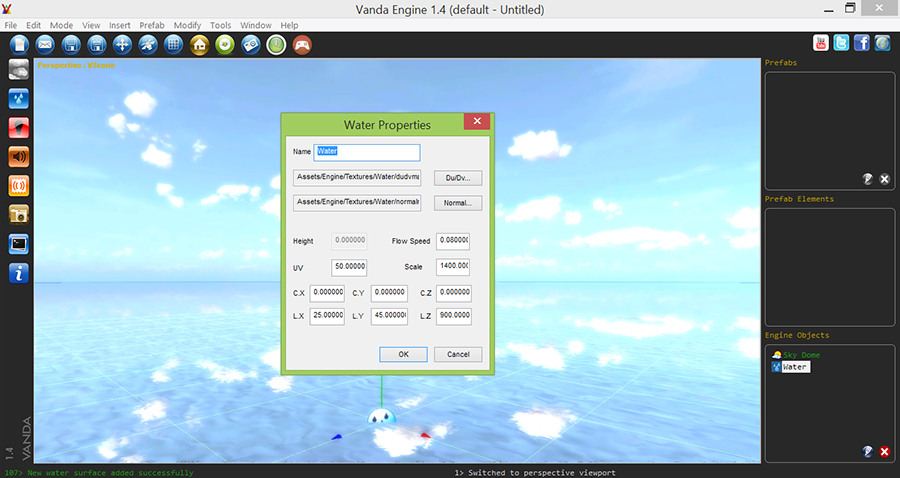
Now it’s time to create our ocean. From the main menu of Vanda Engine, choose Create | Water. This will bring a dialog that lets you change the properties of water. For more information about water properties in Vanda Engine, please refer to this reference. Make sure to set the following values before creating the water:
- Flow Speed: 0.08
- UV: 50
- Scale: 1400
- Cx, Cy and Cz: 0
- Lx:0, Ly: 45, Lz: 900
For this tutorial, I use the default DuDv and Normal textures located in Assets/Engine/Textures/Water/ directory. However, you can use your own DuDv and Normal textures. Please make sure that your textures are in dds format. To change the textures, click the DuDv or Normal buttons, locate your dds textures, and press Open. For more information about generating Du/Dv textures, please refer to the following tutorial:
How To Create DuDv Map For Water Refraction With Photoshop And TGAToDUDV Tool
Changing The Scene Brightness
I noticed that the scene is very bright. To change the brightness of the scene, go to Modify | Bloom and change the value of Intensity. I set the intensity to 0.65.
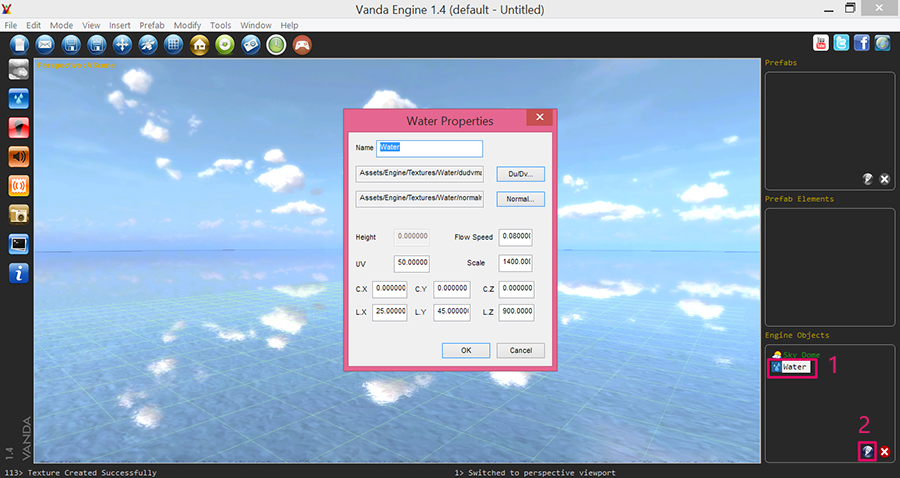
Changing The Water Properties
Sometimes you want to change the properties of the water. Each water is specified by a unique name. To change the properties, click the water icon in Engine Objects and hit Pencil button.
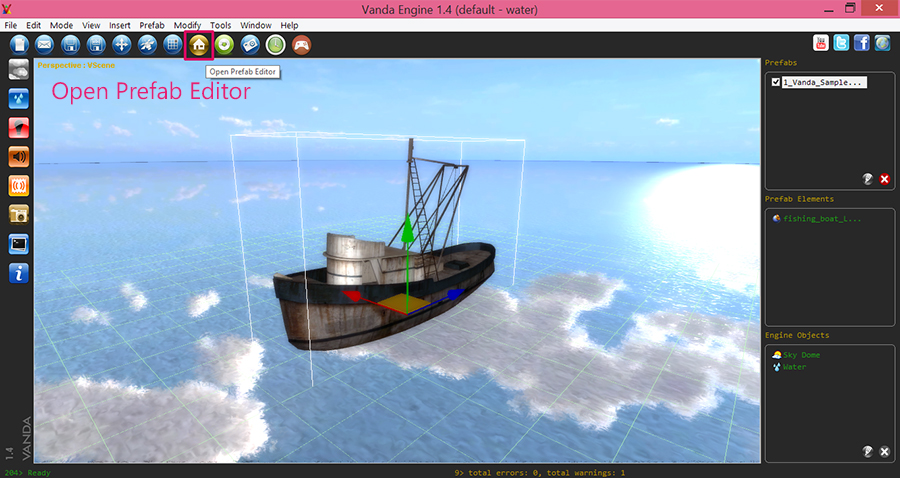
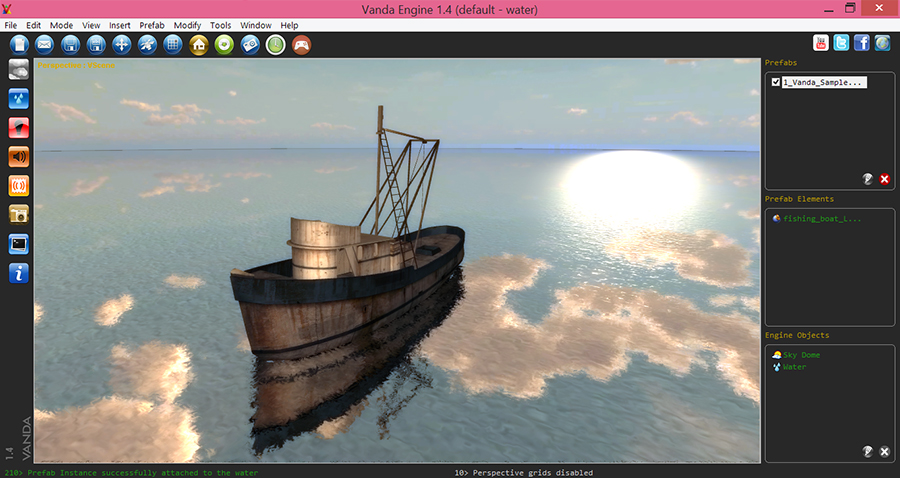
inserting the prefab
I have already created a ship prefab for this tutorial. You can use your own prefabs or prefabs included with Vanda Engine. Click the prefab button (or go to Prefab | Prefab Editor), select your desired prefab, and click Insert.
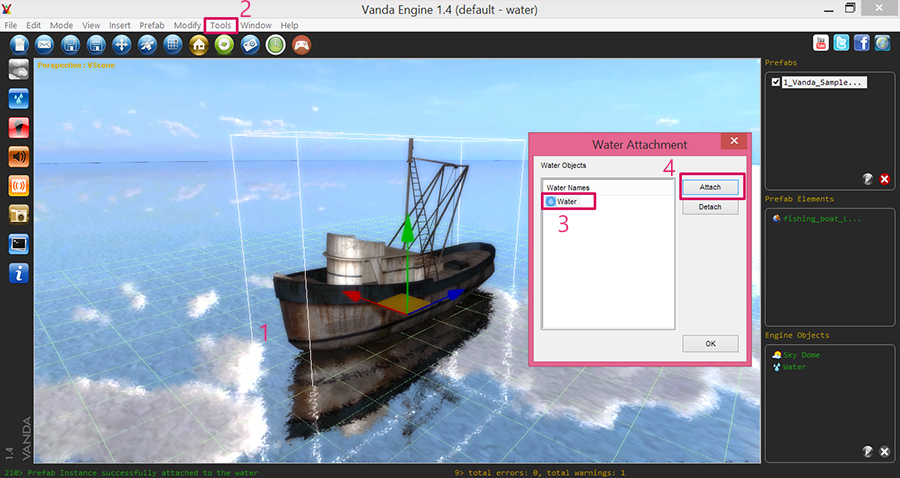
Adding Reflection
Make sure that your prefab is still selected, go to Toos | Water Attachment, select the water object in Water Names list, and press Attach button.
Changing The Scene Color
You can change the overall scene color to simulate different times of day. To do this, go to Modify | Bloom and change the bloom color.
(c) copyright Zehne Ziba Co., Ltd. For more information, please refer to copyright notice.