Part 3: Animating the Worm
Select the Armature and hit Ctrl-Tab to enter Pose Mode. Rotate each bone freely on the Z axis until worm is in a spring shape. Rotating the first bone will rotate the entire worm, use this bone to make your worm look like it’s facing forwards on the Y axis.
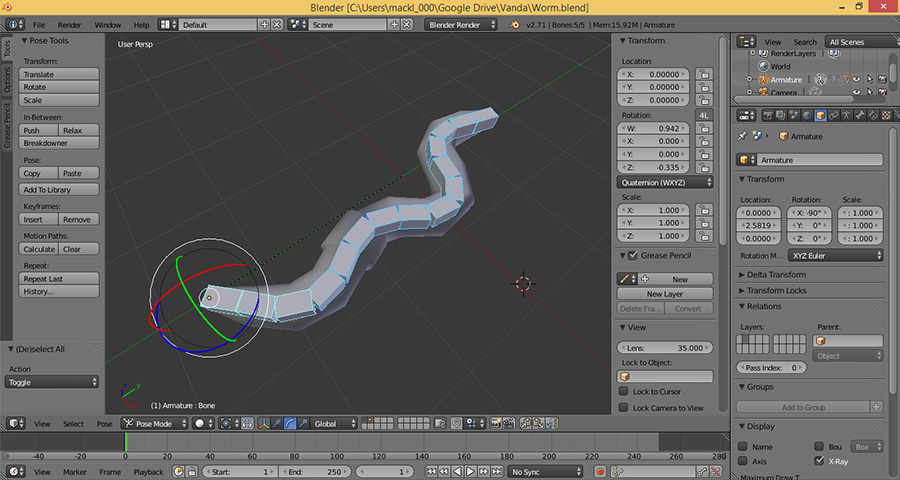
Rotating the bones to create a spring shape
Add a Keyframe at frame 0; select all the bones and press Ctrl-I, then select LocRot.
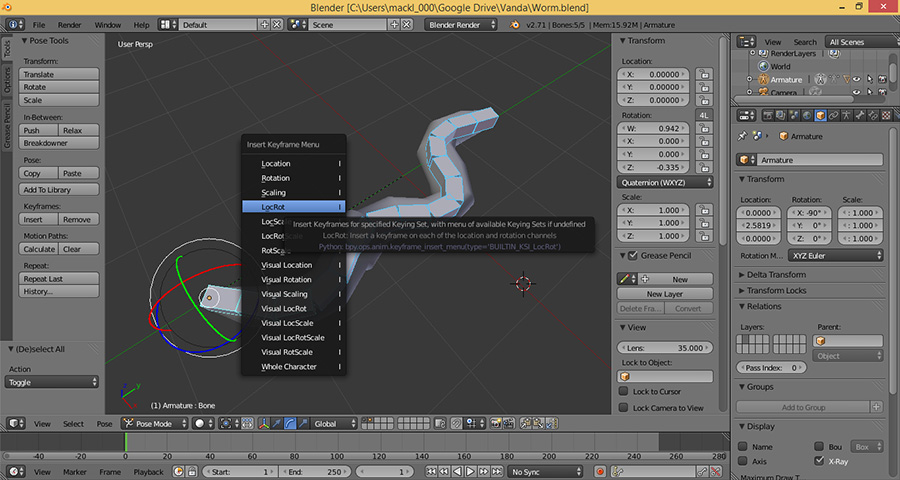
Adding a Keyframe
Select all the bones and press Ctrl-C to copy the current pose. Move the cursor on the timeline to frame 15 and press Ctrl-Shift-V to paste the mirror of the last pose. You may need to rotate the first bone so that the worm points forward after pasting. Add another keyframe here, at frame 15.
Move the cursor again to frame 30, press Ctrl-V to paste the original pose, and add a keyframe. Press E so that the animation ends on this frame. Now press Play to watch the animation. The worm should appear to wiggle in place.
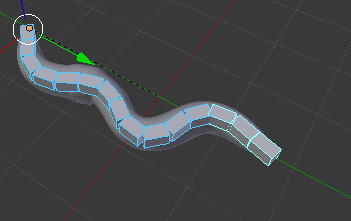
Wiggling animation
Drag the 3d View window by its bottom left handle to split it into two windows. Click the Editor Type selector of the new window and select Dope Sheet.
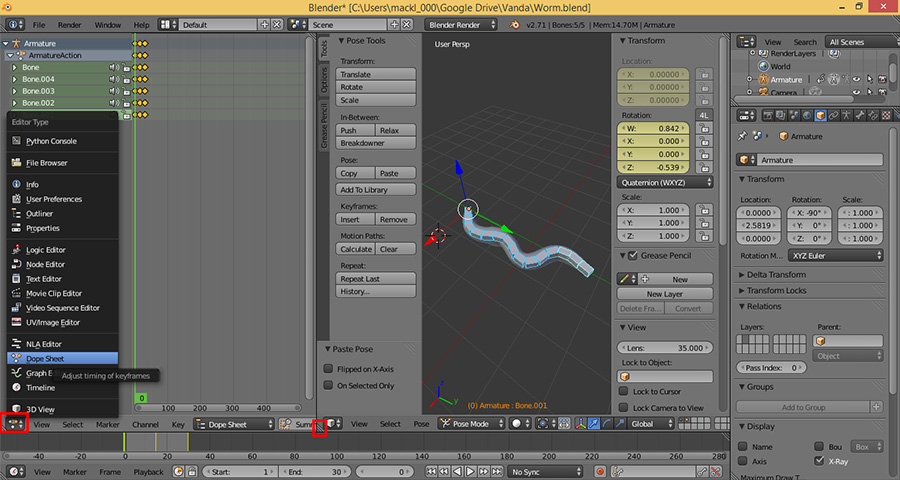
Adding a dope sheet window
Click the mode selector of the Dope Sheet and select Actions.
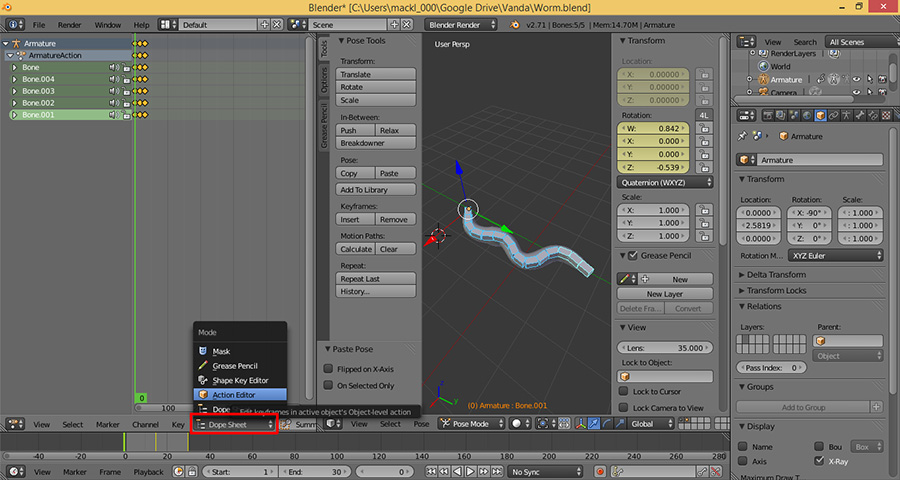
Action Editor Mode
We’ll have to switch between the Dope Sheet window and the 3d View window. To do this, just drag the edge of the window to reveal the side you need to see more of. Reveal the field in the Dope Sheet window that says Armature Action now. Click the field and type “Crawl”. The animation we made before is now called Crawl in the Action selector menu. In addition, click the F next to the field so the button turns a darker gray. This saves the animation even if it is not currently being used by any object.
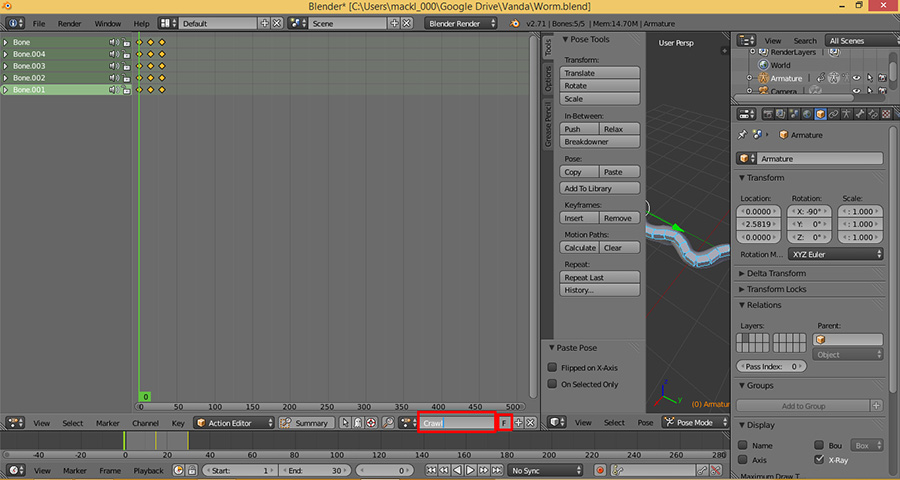
Naming the animation
Now click the plus button next to the Action field. A copy of the last action will be created, which can be seen by the name changing to Crawl.001.

Creating a new action
Rename this new action “Look” and click the F to make sure it is saved when not in use. Now delete all but the first keyframe. Move the Cursor in the timeline to frame 20.
As you can already see, 3d animation is a technically complex task. A worm with five bones is about as simple as it gets. Still, with some creativity there’s a lot we can do even with a simple character. As an example, we’ll make it pause, lift up its “head,” and look to either side before returning to its crawl.
Rotate the third bone from the front of the worm on the X axis so it’s pointing straight up. Rotate the first bone, the “head,” downward so it’s looking forward. Insert a keyframe at frame 20.

Posing the worm
Move the cursor to frame 40, rotate the head to so it faces left, and insert a keyframe.
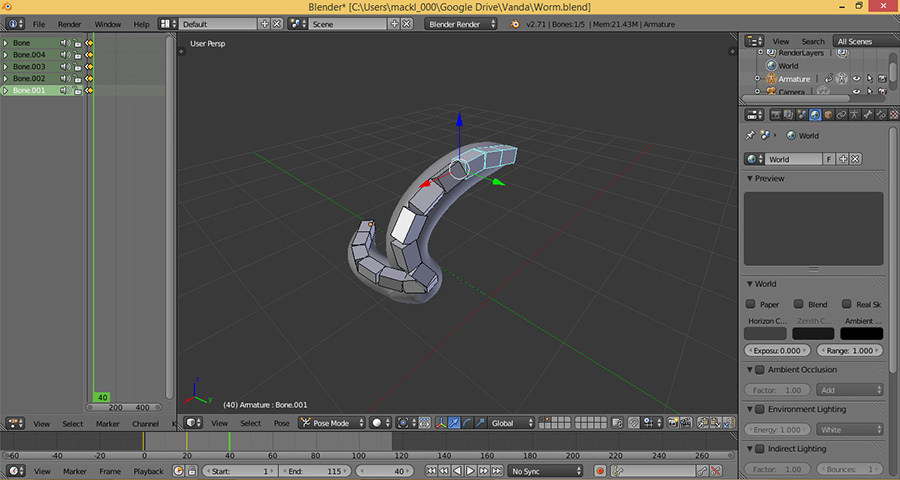
Looking left pose
Move the cursor to frame 75, rotate the head so it faces right, and insert a keyframe.
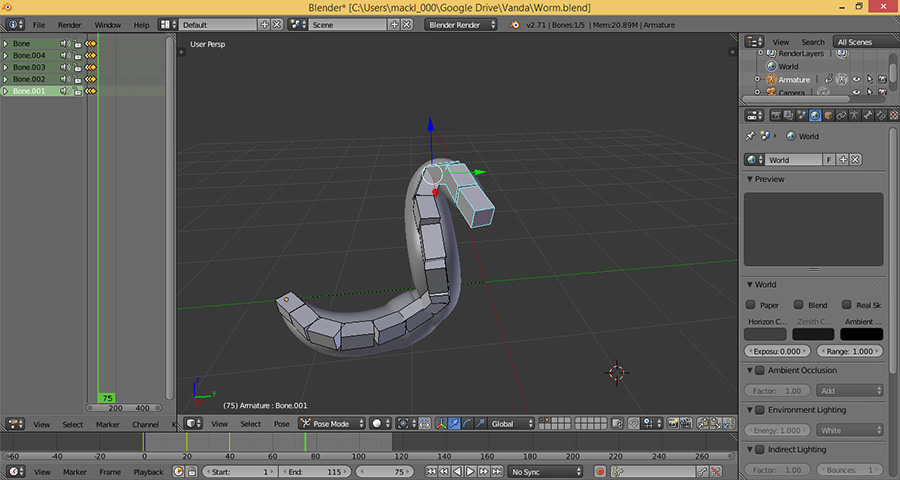
Looking right pose
Copy the pose from frame 20 and paste it onto frame 95. Insert a keyframe here as well. Finally, copy the pose from frame zero and paste it onto frame 115, inserting a keyframe once you have. Press E to set frame 115 as the end of the animation.
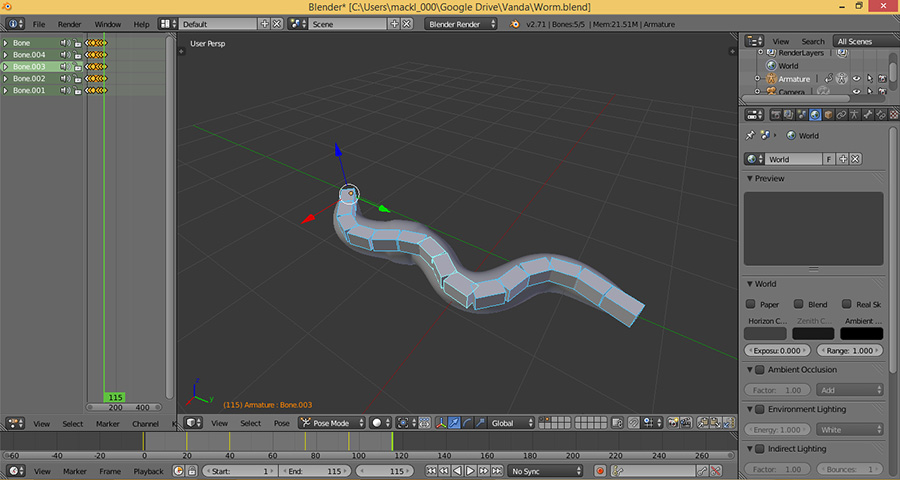
Returning to the original pose
When you hit play the worm should lift its head, look left and right, and then set it down again.

Patrick Manhatton (macklehatton@gmail.com)
Patrick is an independent game designer interested in absolutely every aspect of making games. He does a little of everything involved in game development and a lot of conceptual design and 3d modelling. He is currently studying computer science and psychology and hopes work in research using games.
(c) copyright Zehne Ziba Co., Ltd. For more information, please refer to copyright notice.
 Vanda Engine