 Vanda Engine
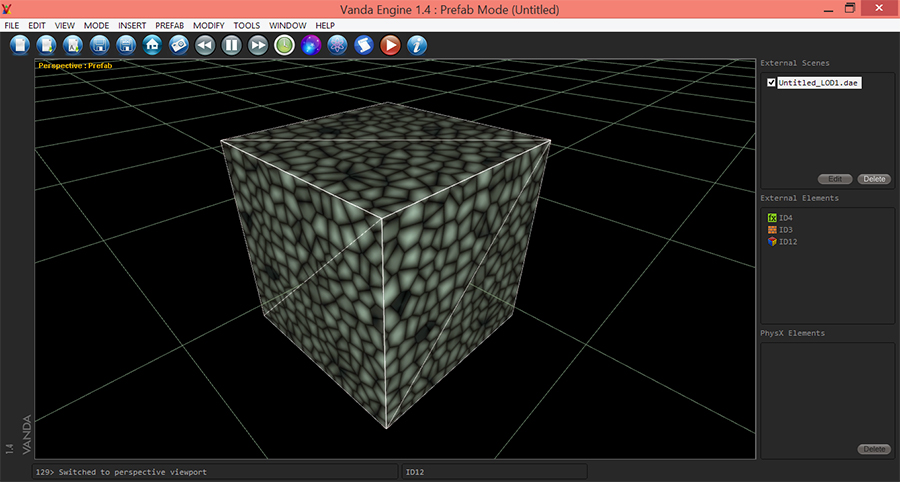
Although COLLADA supports exchanging shaders between 3D tools, some applications and game engines are not capable of exporting and importing shaders to and from COLLADA format. Due to that, we try to use a method that is supported by all game engines and 3D applications: In first step, we create a shader in Cinema 4D, assign the shader to a simple box object, and bake the noise shader to texture. In second step, we create a new material, assign the baked texture to diffuse channel of our new material, assign the material to our box object, and export the scene to COLLADA 1.4 format. In this tutorial, we create a noise shader and box object, however, the same method can be applied to any other shaders and objects while exporting to any other file formats.
Creating Your Material
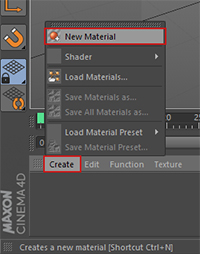
Run Cinema 4D and point to Create | New Material.
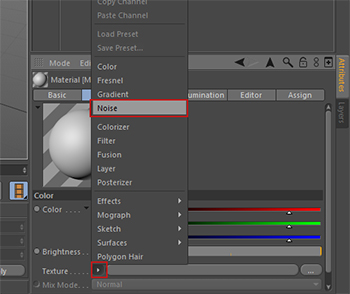
Click the new material to bring up the attributes panel of the material. Click the arrow key beside the texture property and choose Noise.
I choose Multiply from the Mix Mode… drop down to mix the selected color with noise pattern and choose a greenish color. It should look something like this:

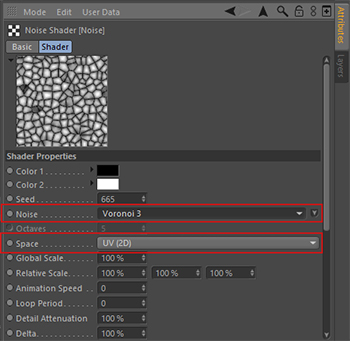
Now click the big Noise button to bring up the Noise properties.
I prefer to choose Voroni 3 noise from the Noise drop down menu. Now select the UV (2D) space, otherwise, your baked texture isn’t exported to COLLADA format.
Creating Your Object And Baking The Texture
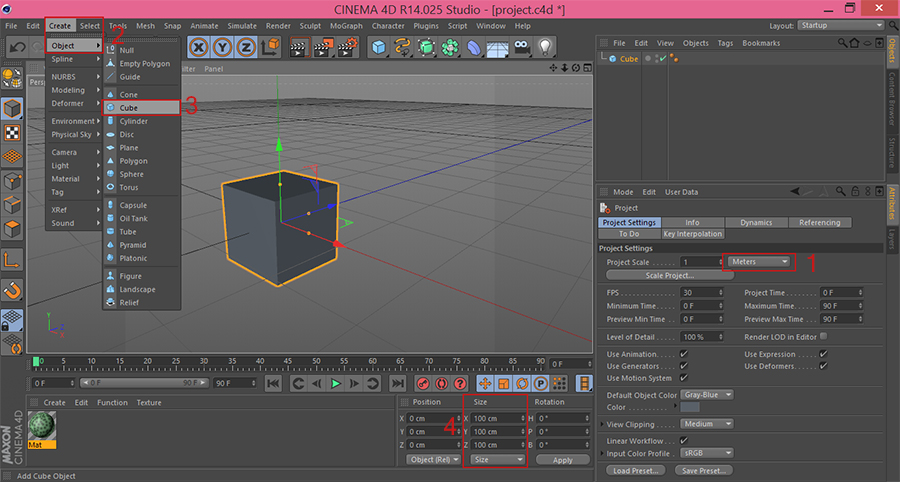
Hit Ctrl+D to bring up the Project panel and choose Meter metrics. From the main menu of Cinema 4D, point to Create | Object | Cube and set its size to 100 * 100 * 100 cm. It equals to a 1 * 1 * 1 unit cube in Vanda Engine. Zoom in your view using mouse wheel to view the cube.
Drag and drop the material into your cube. Select your cube object and point to Objects | Bake Texture… menu to bring up the bake texture panel.
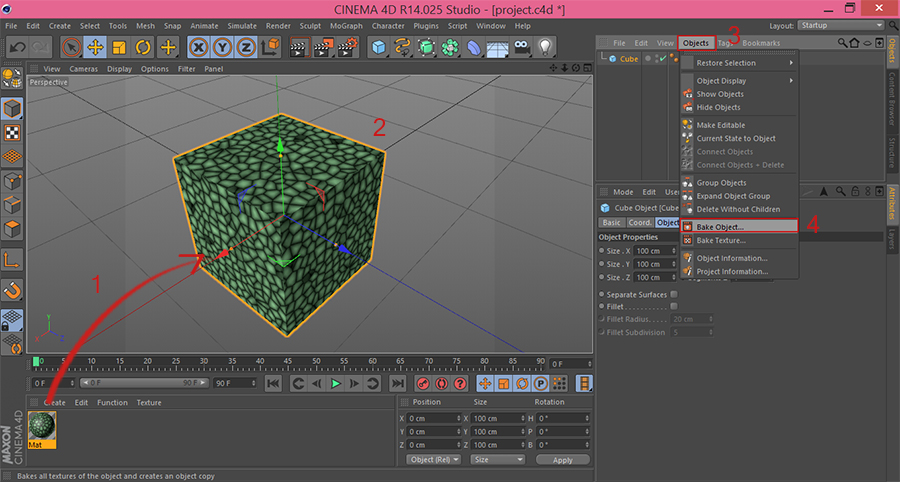
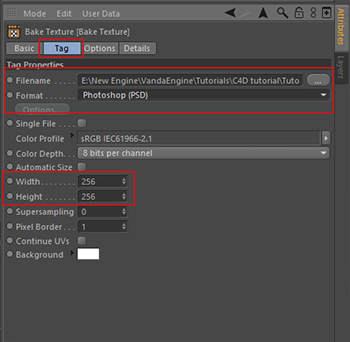
In Bake Texture panel, hit Tag tab to view the Tag Properties. In Filename property, hit the … button to choose your texture file name and where it is saved. Select your desired texture format, texture width and texture height. I prefer PNG type and set width and height to 512 * 512.
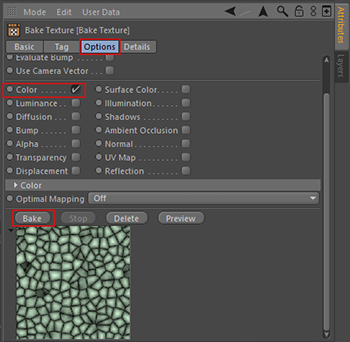
Now hit Options tab, check Color property, and hit Bake button to bake the texture to selected destination.
Creating A New Material
Before we proceed, save your project to make sure that our new texture are copied to a texture folder beside our .c4d file.
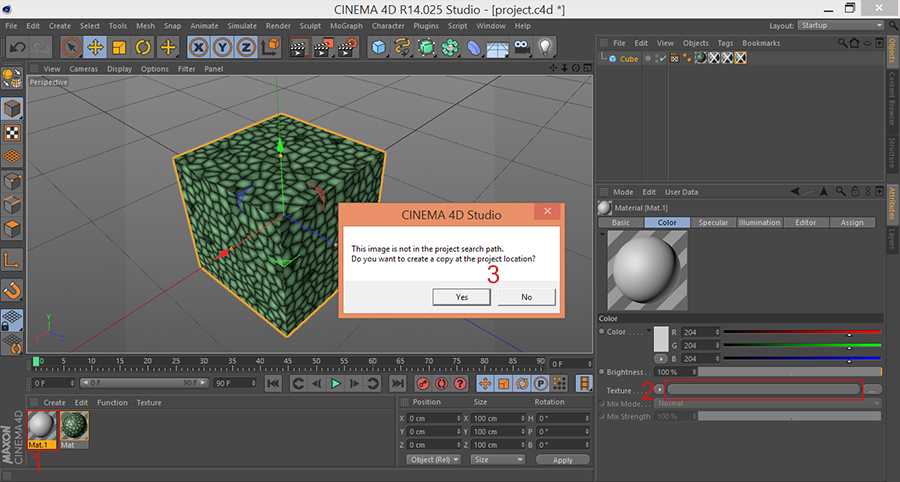
Create a new material by going to Create | New Material. Click your newly created material to bring up the Material panel. Click the texture button, locate your baked texture file name, and hit Open. Now you have two options in a new dialog that appers. If you press Yes, Cinema 4D will copy your selected texture file name to a texture directory beside your c4d file . In this case, if you export your scene to COLLADA, Cinema 4D exports the address of texture file located in that texture directory. Here’s an example of dae file opened with my text editor:
<image id="ID5">
            <init_from>tex/CubeColor.png</init_from>
</image>
When you import the dae file, your game engine (or 3D application) looks for CubeColor.png file in tex folder beside your c4d file. It’s called relative address. I prefer this method.
If you press No, Cinema 4D does not copy your original file to texture directory. Here’s an example of a texture address after exporting to dae file:
<image id="ID5">
            <init_from>file:///C:/Users/Eight/Desktop/CubeColor.png</init_from>
</image>
In this case, your favorite game engine looks for CubeColor.png texture in C:/Users/Eight/Desktop/ directory.
Finally, drag and drop the new material to your new material to cube object.
Exporting To COLLADA Format
Most game engines (and Vanda Engine) are compatible with COLLADA 1.4 exporter of Cinema 4D. Point to File | Export | COLLADA 1.4 (*.dae), give your file a name, and hit Save button, In a new dialog that appears, check Export Triangles and hit press OK button to export your scene to COLLADA format.
A Few Notes About Vanda Engine And COLLADA Importer
- Vanda Engine accepts dds texture types. It should be located beside your original texture file name (for example beside CubeColor.png) and must have the same name as original texture file (In this case it must be CubeColor.dds)
- Vanda Engine automatically triangulates the meshes while importing dae files. So Export Triangles option in COLLADA exporter of C4D is irrelevant.
- Cinema 4D does not export what is called Ambient color in COLLADA specification. To fix this issue, Vanda Engine provides a tool which lets your modify the ambient color of imported file. Simply go to Modify | Geometry | Ambient Color to change the ambient color.
(c) copyright Zehne Ziba Co., Ltd. For more information, please refer to copyright notice.